Getting started
The Leads module is where every potential customer enters blink i — from first enquiry to site visit to booking. This chapter covers how to navigate the module and what each pipeline stage means.
1.3 — Pipeline stages
Every lead moves through a fixed pipeline. The current stage is always visible as a coloured pill on the list and at the top of the lead detail. Stages in order:
| Stage | Meaning |
|---|---|
| New | Lead has just entered the system. No contact made yet. |
| Contacted | First contact has been made (call, WhatsApp, email). Lead is aware of the project. |
| Visit Scheduled | A site visit has been booked for this lead. |
| Visit Done | The lead has completed at least one site visit. |
| Booked | A booking has been created for this lead. The lead is closed as won. |
| Lost | The lead will not be converting. A lost reason is required. |

The Leads list
Leads › All Leads is the main working view. It shows every lead your role can see, with filters, a KPI strip, and quick actions on each row.
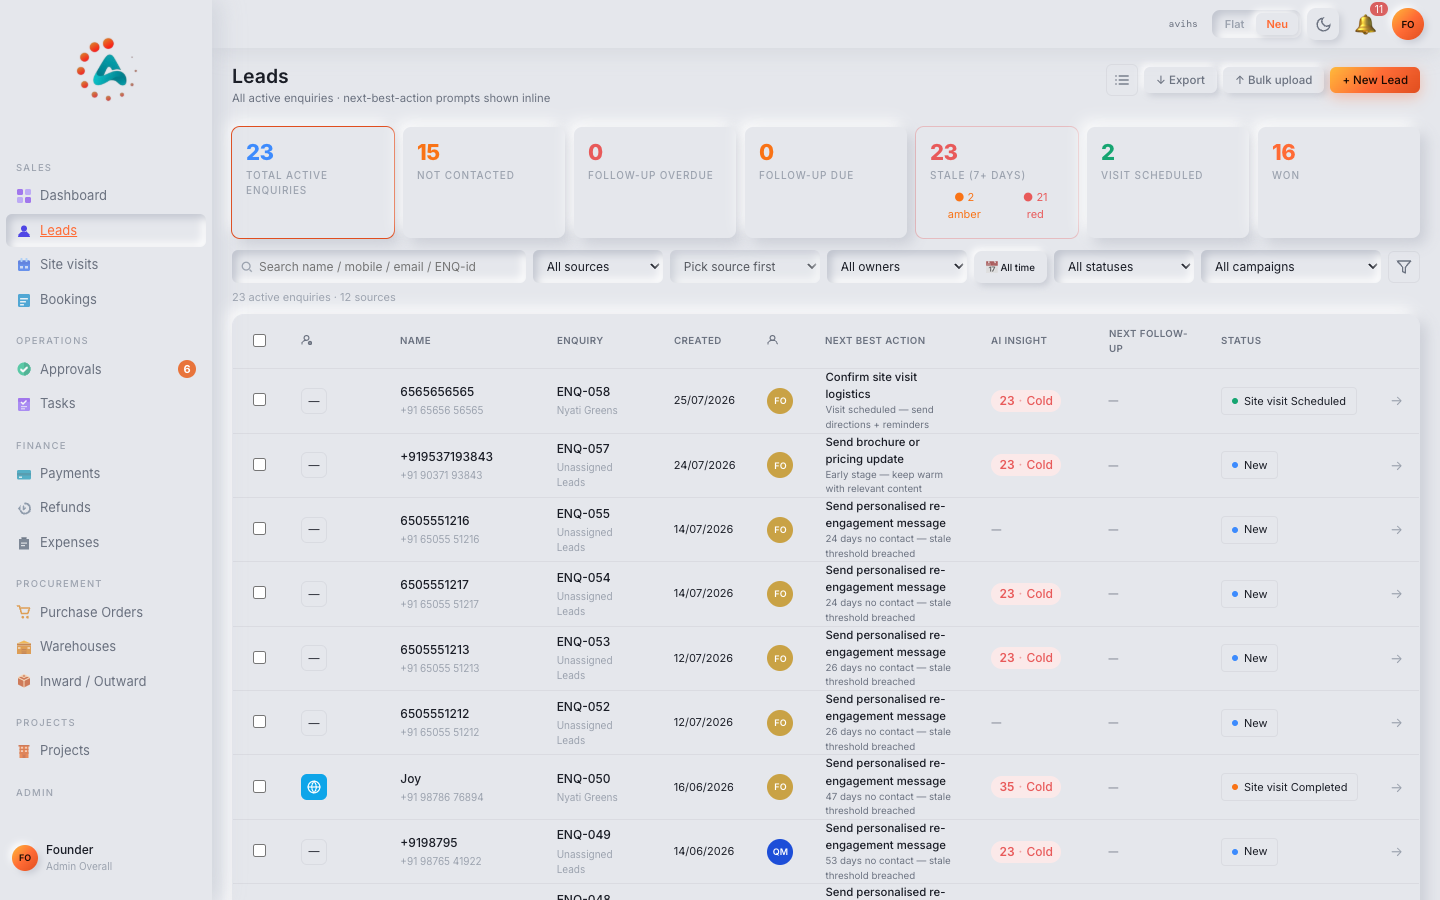 Web
Web
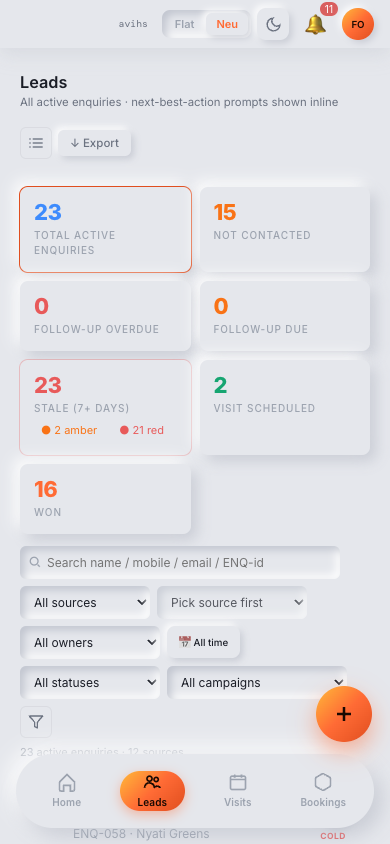 Mobile
2.2 — KPI strip
The strip of summary tiles at the top updates as the date-range and project filter change:
| Tile | What it counts |
|---|---|
| Total Leads | All leads in the current filter scope. |
| New | Leads in the New stage — not yet contacted. |
| Follow-ups Due | Leads with a follow-up scheduled for today or earlier that is not yet completed. |
| Visits Scheduled | Leads with an upcoming site visit booked. |
| Booked | Leads converted to a booking in the date range. |
| Lost | Leads marked lost in the date range. |
Clicking a tile filters the list below to just those leads — e.g. clicking Follow-ups Due shows only leads with overdue follow-ups.
2.3 — List columns
| Column | What it shows |
|---|---|
| Lead ID | Unique reference, e.g. L-0042. Clicking opens the lead detail. |
| Name | Lead's full name and, if available, their profile photo. |
| Phone / Email | Primary contact. The phone number links to dial or copy. |
| Source | Where the lead came from: Manual, Meta, WhatsApp, or Referral. |
| Project Interest | The project the lead is enquiring about. |
| Assigned To | The sales agent responsible. Blank if unassigned. |
| Stage | Current pipeline stage pill. |
| Next Follow-up | Date of the next scheduled follow-up. Overdue if in the past. |
| Last Activity | Date of the most recent note, call log, or stage change. |
| Created | When the lead entered blink i. |
| Actions | View opens the detail; quick stage buttons appear on hover for managers. |
2.4 — Filters & search
The filter row above the list lets you narrow leads without losing the KPI context. Filters combine — all active filters apply at once:
- Search — name, phone, or email. Matches as you type.
- Stage chips — All, New, Contacted, Visit Scheduled, Visit Done, Booked, Lost. Click one to filter; click again to clear.
- Source — dropdown to show only Manual, Meta, WhatsApp, or Referral leads.
- Agent — managers can filter to a single agent's leads.
- Project — filter to leads interested in a specific project.
- Follow-up date — Today, This week, Overdue, or a custom date range.
Adding leads
Leads enter blink i in four ways: manual entry, Meta (Facebook/Instagram) lead forms, WhatsApp enquiries, and bulk CSV import. All four create the same lead record.
3.1 — Manual entry
Choose + Add Lead (top-right of the Leads list) to open the create form.
| Field | Notes |
|---|---|
| First Name / Last Name | Required. |
| Phone | Required. Stored in E.164 format — enter with country code or select the flag first. |
| Optional but recommended for WhatsApp and email follow-up. | |
| Project Interest | Which project the lead is enquiring about. Can be changed later. |
| Source | How the enquiry reached you — Manual, Referral, Walk-in, or another tag your workspace uses. |
| Referred By | Appears when Source is Referral. Enter the referrer's name or pick an existing contact. |
| Assigned To | The sales agent to own this lead. Defaults to you if you are an agent. |
| Notes | Any initial context — budget range, plot preference, urgency. |
Click Save Lead to create the record in the New stage. The lead immediately appears in the list and the assigned agent is notified.
3.2 — Automatic lead sources
blink i captures leads automatically from two external sources — no manual entry needed:
| Source | How it works |
|---|---|
| Meta (Facebook / Instagram) | Lead forms connected in Settings › Meta push new submissions directly into blink i. Each form maps to a project and optionally a default agent. Leads appear tagged Meta with the page and form name recorded. |
| When a prospect messages your business WhatsApp number for the first time, blink i can create a lead automatically (if the WhatsApp integration is configured in Settings). These leads are tagged WhatsApp and the conversation thread is attached. |
3.3 — Bulk CSV import
To import a list of leads at once, choose Import (top-right of the Leads list, beside + Add Lead). Download the CSV template, fill it in, and upload.
- Required columns:
first_name,phone. - Optional columns:
last_name,email,source,project,assigned_to,notes. - Duplicate phone numbers are flagged before import — you can choose to skip or update the existing lead.
- All imported leads start in the New stage.
- A post-import summary shows how many were created, skipped (duplicates), and failed (missing required fields).
Lead detail
Click View on any row, or the lead's name, to open the full detail. Everything about a lead — contact information, history, follow-ups, and actions — lives here.
 Web
Web
 Mobile
4.2 — Contact & interest panel
The left panel of the lead detail shows:
- Stage badge — the current stage pill with a Change Stage button to advance or correct it.
- Contact details — phone (tap to call on mobile), email, and the WhatsApp chat link if the lead came from WhatsApp.
- Project interest — which project they are interested in. Change this if the lead shifts interest to a different project.
- Source — how the lead came in (read-only after creation).
- Assigned To — the owning agent. Managers can change this; see 4.3.
- Created / Last activity — timestamps.
- Budget range / Plot preference — optional fields your team fills in during qualification.
Use Edit (top-right of the panel) to update any of the contact or interest fields.
4.3 — Reassigning a lead
To transfer a lead to a different agent, click Edit on the contact panel, change the Assigned To field, and save. The new agent is notified immediately and the reassignment is recorded in the Activity Log with the name of the user who made the change.
4.4 — Activity log & notes
The right panel of the lead detail is the activity timeline — a reverse-chronological record of everything that has happened to this lead:
| Entry type | What triggers it |
|---|---|
| Note | Manually added by an agent — call summary, lead preference, objection raised. |
| Stage change | Any time the lead moves from one stage to another. |
| Follow-up scheduled | When a follow-up is created on the lead. |
| Follow-up completed | When a follow-up is marked done, with the completion note. |
| Site visit scheduled | When a visit is booked for this lead. |
| Site visit outcome | When the visit is marked complete with its outcome. |
| Assigned | When the lead is (re)assigned to an agent. |
| Booking created | When a booking is raised from this lead. |
To add a note, type in the Add note… box at the top of the timeline and click Save note. Notes support plain text; keep them concise and factual for the next person who reads the lead.
Follow-ups
A follow-up is a scheduled reminder to contact a lead again. Every open lead should have a future follow-up date set — it is your commitment to act on it.
5.2 — Scheduling a follow-up
Open the lead detail and click + Schedule Follow-up (in the activity panel or the follow-up section). A small form appears:
| Field | Notes |
|---|---|
| Follow-up Date | Required — the date you intend to contact the lead. |
| Follow-up Time | Optional — a specific time, useful for scheduled calls. |
| Mode | How you plan to reach them: Call, WhatsApp, Email, or In-person. |
| Notes | What to discuss or ask — e.g. "Check if they've seen the brochure". |
Click Save. The follow-up appears in the activity log and the Next Follow-up column on the list updates. The lead also appears in Leads › Follow-ups on that date.
5.3 — Completing a follow-up & adding a note
When you have made contact, open the lead and click Complete Follow-up on the open follow-up card in the activity panel. A completion form appears:
| Field | Notes |
|---|---|
| Outcome | What happened: Reached (spoke to lead), No answer, Callback requested, or Not interested. |
| Notes | A summary of the conversation — what was discussed, what was agreed, any objections raised. |
| Schedule next follow-up | Toggle on to immediately schedule the next contact. Sets the date in the same step. |
Click Save. The completion note is added to the activity log and, if you scheduled the next follow-up, the new date appears on the list.
5.4 — Overdue follow-ups
A follow-up becomes overdue at midnight on its due date if it has not been completed. Overdue leads are highlighted with a Overdue badge on the list and are included in the Follow-ups Due KPI tile.
- Go to Leads › Follow-ups to see a focused list of all overdue and due-today follow-ups.
- The Dashboard's Home view also surfaces the count — managers can see this per agent on the Sales Dashboard.
- An overdue follow-up does not block any action; it is a visibility signal, not a lock.
- Complete or reschedule overdue follow-ups as soon as possible — cold leads convert at a much lower rate.
Site visits
A site visit is a physical or virtual tour of the project. Scheduling one moves the lead to Visit Scheduled; recording its outcome moves it to Visit Done.
6.2 — Scheduling a visit
Open the lead detail and click Schedule Site Visit. Fill in the visit form:
| Field | Notes |
|---|---|
| Visit Date | Required — the date the lead will visit the site. |
| Visit Time | Optional — the scheduled time for the visit. |
| Project | The project being visited. Defaults to the lead's Project Interest. |
| Agent | The agent who will conduct the visit. Defaults to the lead's assigned agent. |
| Notes | Anything the visiting agent should know — lead's specific interests, questions raised in earlier calls. |
Click Schedule Visit. The lead stage moves to Visit Scheduled, a visit record is created under Leads › Site Visits, and the event appears in the activity log. The visiting agent is notified.
6.3 — Recording a visit outcome
After the visit, open the lead (or the visit record in Leads › Site Visits) and click Record Outcome.
| Field | Notes |
|---|---|
| Outcome | Completed (visit happened), No-show (lead did not arrive), or Rescheduled (a new visit date was agreed). |
| Notes | What the lead thought of the site, any pricing discussions, objections, or next steps agreed. |
| Check-in / Check-out time | Actual arrival and departure times if tracked. |
If the outcome is Completed, the lead moves to Visit Done. If Rescheduled, a new visit is created and the stage stays at Visit Scheduled. If No-show, the stage reverts to Contacted and a follow-up prompt appears.
Moving & closing leads
Leads only move when you tell them to. Here is how to advance the stage, mark a lead lost with a reason, and convert a won lead into a booking.
7.1 — Changing the stage manually
On the lead detail, click Change Stage (beside the stage pill in the header). A dropdown shows the stages you can move to from the current one. Select the target stage and confirm. The change is logged in the activity log with your name and a timestamp.
- You can move a lead backward if a stage was set in error — e.g. from Contacted back to New.
- Moving to Visit Scheduled directly (without using Schedule Visit) does not create a visit record — use the Schedule Site Visit button instead.
- Moving to Booked directly is blocked — use Create Booking instead (see 7.3).
7.2 — Marking a lead lost
Click Mark as Lost on the lead detail (or choose Lost from the Change Stage dropdown). A required Lost Reason field appears:
| Lost reason | When to use |
|---|---|
| Budget — too expensive | Lead cannot afford the project pricing. |
| Location not suitable | Project location does not work for the lead. |
| Went with competitor | Lead has booked with another developer. |
| Not ready to buy | Lead is exploring but not actively purchasing right now. |
| No response | Lead has gone unresponsive after multiple contact attempts. |
| Duplicate lead | This lead is the same person as another record. |
| Other | Any other reason — add a note explaining. |
Select a reason, optionally add a note, and confirm. The lead is moved to Lost and removed from the active funnel. Lost leads are still searchable and appear in reports.
7.3 — Creating a booking from a lead
When a lead is ready to buy, click Create Booking on the lead detail. This opens the booking creation form with the lead's name, contact, and project pre-filled. Complete the booking details (plot / unit, sale value, payment plan) and submit.
- On booking creation, the lead stage automatically moves to Booked.
- The booking record links back to the originating lead — visible on both the lead detail and the booking detail.
- A lead can have only one booking. If a second booking is needed (rare), create it from Bookings › + New Booking and link the lead manually.
The full lead flow
From first touch to booking confirmation — the typical journey of a lead through blink i.
-
Lead enters blink i — via Meta form, WhatsApp, manual entry, or CSV import. Stage is New. If unassigned, a manager assigns it from Leads › Unassigned.
-
First contact — the assigned agent calls or messages the lead. After contact, the agent changes the stage to Contacted and adds a note summarising the conversation.
-
Schedule a follow-up — if the lead is interested but not ready to visit, the agent schedules a follow-up for the agreed callback date. The lead appears in the Follow-ups view on that day.
-
Book a site visit — when the lead is ready to visit, click Schedule Site Visit. Stage moves to Visit Scheduled. The visiting agent receives a notification.
-
Record the visit outcome — after the visit, click Record Outcome. If the visit completed, stage advances to Visit Done. Add a note with the lead's feedback and any pricing discussion.
-
Negotiation & follow-up — continue follow-ups and notes as the lead considers. Each interaction is logged in the activity timeline, giving full context to anyone picking up the lead.
-
Create the booking — when the lead commits, click Create Booking. Stage moves automatically to Booked. The booking module takes over from here — payment schedule, KYC, approval workflow.
If at any point the lead disengages, click Mark as Lost, select a reason, and the lead exits the active funnel. The activity log, notes and visit history are all preserved for future reference.