Getting started
Covers login, navigation, and the shared controls that appear on every screen in blink i.
1.2 — Logging in
Open the blink i workspace in your browser. On the sign-in screen, enter your work email and password, then choose Enter command centre.
- Tick Keep me signed in to stay logged in on a trusted device.
- Use Forgot password? · Reset via email if you cannot sign in.
- If a module described here is missing from your sidebar, your account has not been granted permission — contact your workspace administrator.
1.4 — Conventions used on every screen
The same building blocks appear across all modules. Learn them once:
| Control | What it does |
|---|---|
| KPI strip | The row of summary tiles across the top of each list (totals, pending, approved, alerts). They update as data changes and give an at-a-glance health check. |
| Tabs | Switch between related views of the same screen — e.g. Warehouses / All SKUs, or the project workspace tabs (Overview, Pricing, Development / Budget…). |
| Filter chips | The pill row above a table (All, Draft, Approved…) narrows the list by status. A search box narrows by text. |
| Status pills | Colour-coded labels showing state — Draft Pending Approved Rejected |
| Primary button | The solid orange button (top-right of a screen or bottom-right of a modal) is the main action, such as + Add expense or Record Inward. |
| Save draft vs Save & Submit | Create modals offer two actions. Save draft stores the record without starting approval; Save & Submit files it and sends it into the approval / active workflow. Save & Submit is the primary (orange) action. |
| Detail view | Clicking View on a row opens the full record, with its line items, history and the actions available for its current state. |
Expenses
Expenses records money spent on a project — materials, labour, services — routes it for approval, and tracks payment until it is cleared.
2.2 — The Expenses list
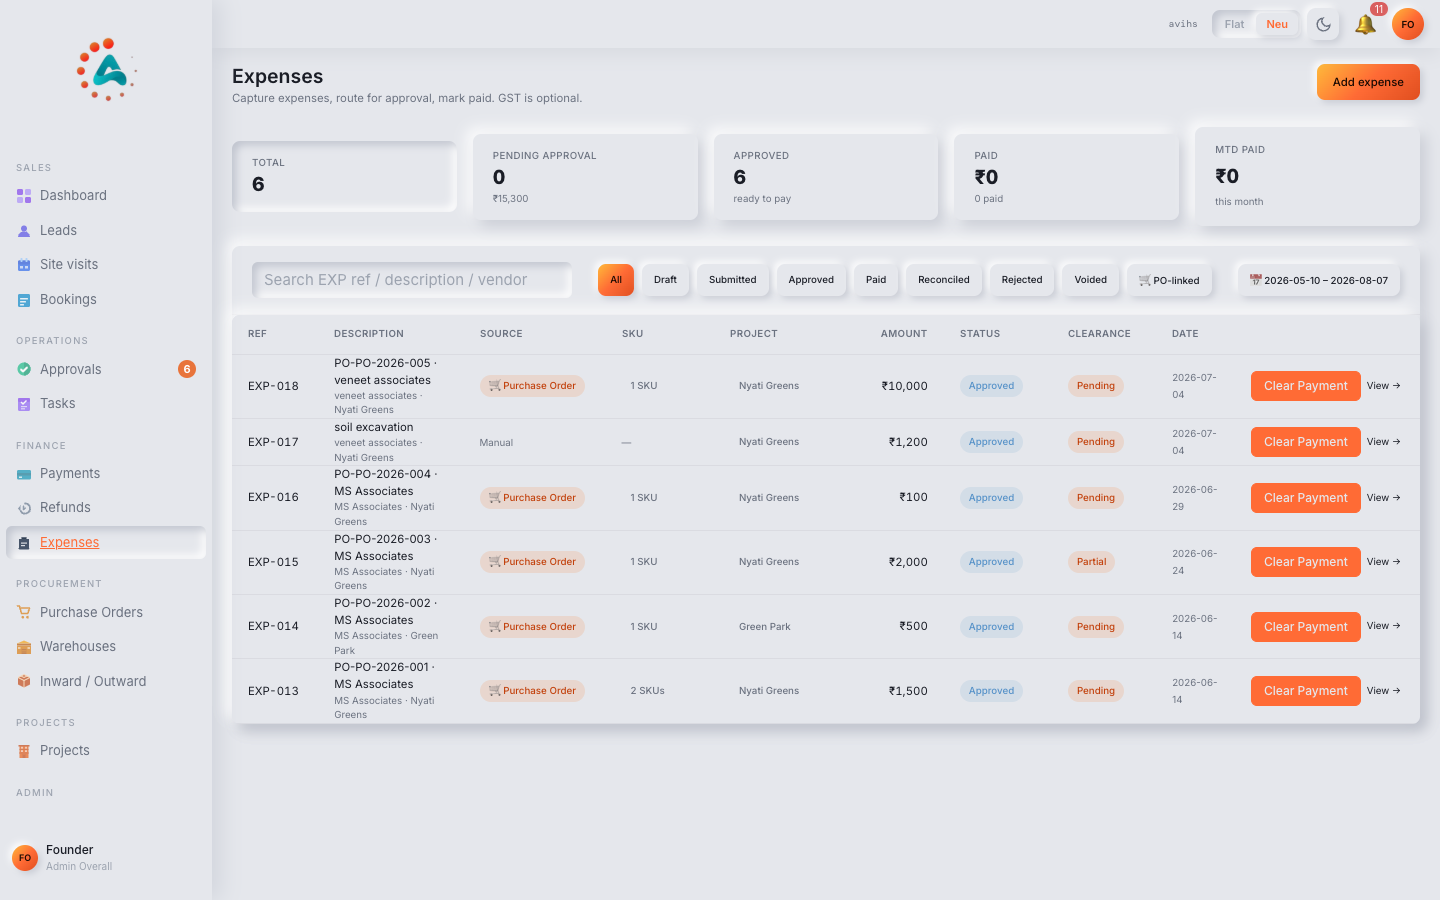
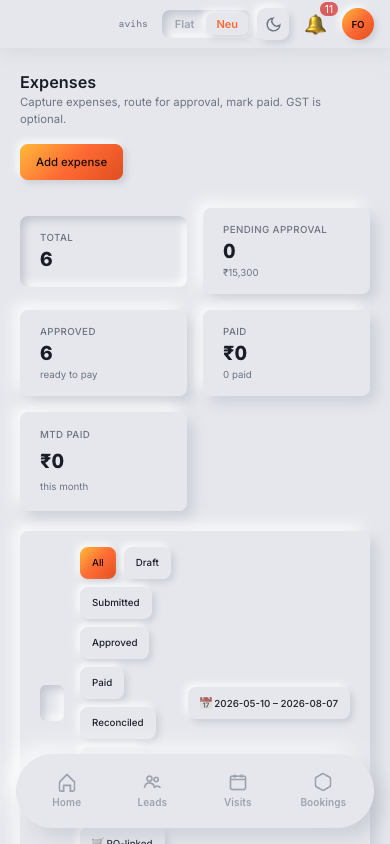
Finance › Expenses opens the list. The KPI strip shows the totals that matter: how many expenses exist, how much is pending approval, how many are approved and ready to pay, how much has been paid, and the month-to-date paid figure.
 Web
Web
 Mobile
Below the KPIs, a search box and status filter chips narrow the list. The PO-linked chip isolates expenses that came from a purchase order. Each row shows:
| Column | What it shows |
|---|---|
| Ref | The expense number (EXP-001, EXP-002…), assigned automatically. |
| Description | What the spend was for. PO-linked expenses show the source PO reference. |
| Mode | How it was paid or is to be paid (e.g. UPI). |
| Source | Manual or Purchase Order — where the expense originated. |
| Inward | Goods-receipt state for PO-linked rows (Received / Not Received / N/A). |
| SKU / Project / Amount | The item(s), the project the spend belongs to, and the value. |
| Status | Draft Submitted Approved Rejected or Paid / Reconciled / Voided. |
| Clearance | Payment state — Pending until the expense is fully paid. |
| Actions | Clear Payment to record money paid, and View to open the detail. |
2.3 — Adding an expense
Choose + Add expense (top-right) to open the create modal. Complete the fields, then decide how to save:
| Field | Notes |
|---|---|
| Vendor | Who was paid. Optional for ad-hoc spend. |
| Project | Required — the project the expense belongs to. This drives the category list. |
| Expense Date | When the spend occurred. |
| Category | The expense category (e.g. Civil Work, Temple Development). Pick the project first. |
| Description | A short note on what the spend was for. |
| Line items | One or more rows: SKU / category, quantity, unit of measure, unit price. + Add line item adds another row; the amount totals automatically. |
- Save draft — stores the expense as a Draft without starting approval. Use this when details are still incomplete.
- Save & Submit — files the expense and routes it for approval. This is the primary action.
- Cancel — closes the modal without saving.
2.4 — Expense detail & recording payment
Clicking View on a row opens the full expense. The header shows the reference, its status pills and the source. Summary fields give the date, project, vendor, category and amount.
- PO Line Items — for a PO-linked expense, the ordered / received / pending quantities and totals per SKU.
- Payment Clearance — total, paid and remaining amounts with a clearance status. Use + Record Payment (or Record Payment in the header) to log money paid; the remaining balance falls until the expense is cleared.
- Source link — an expense auto-created from a PO shows a View Purchase Order → link back to its order.
Purchase Orders
A purchase order (PO) is a formal order to a vendor for one or more SKUs. Once approved, blink i automatically creates a matching expense and makes the order available for goods receipt.
3.2 — The Purchase Orders list
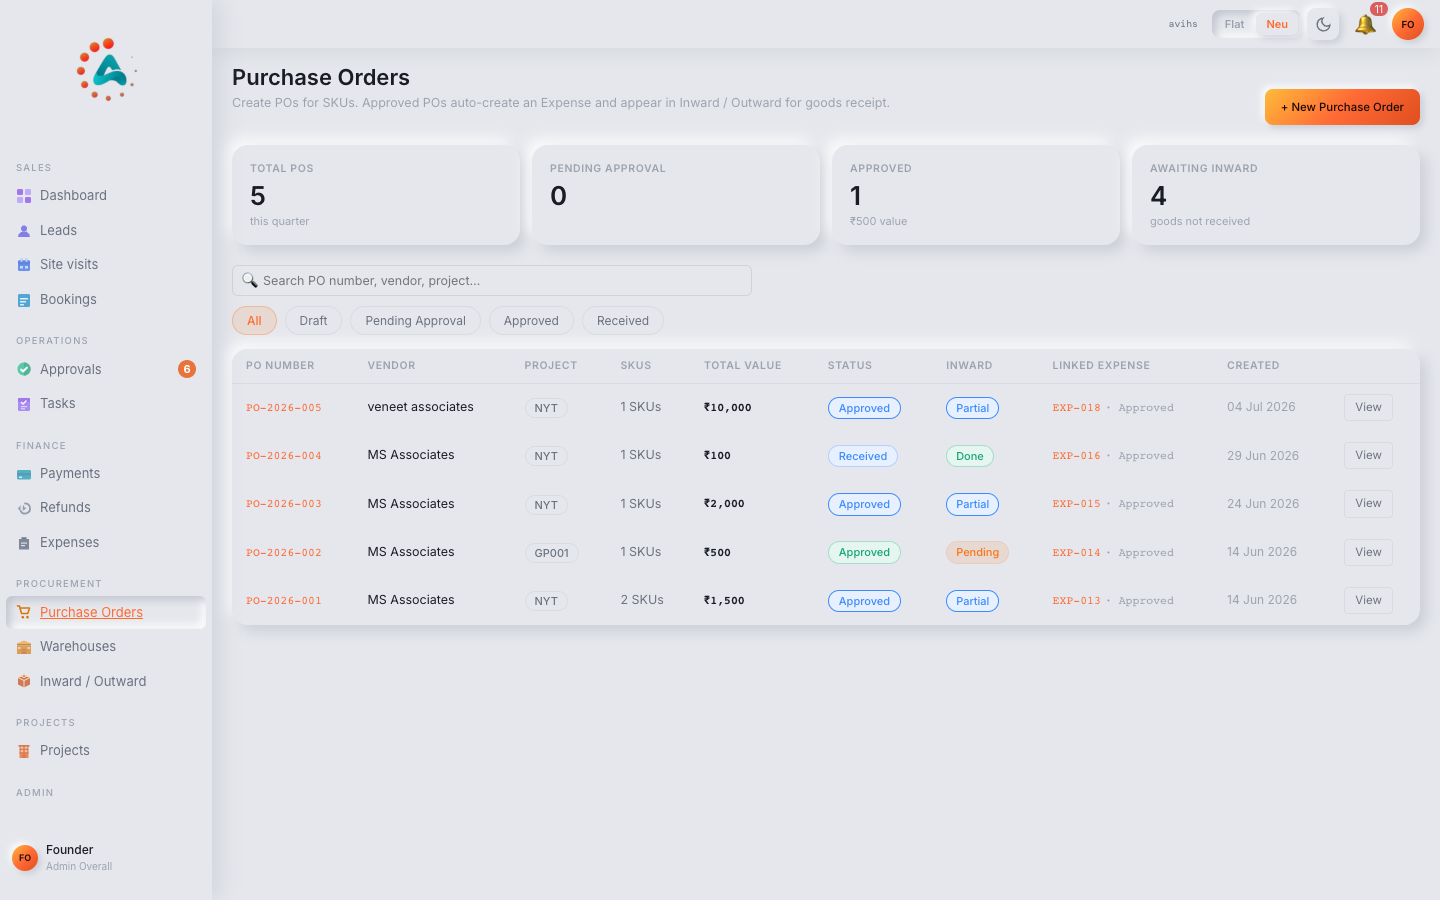
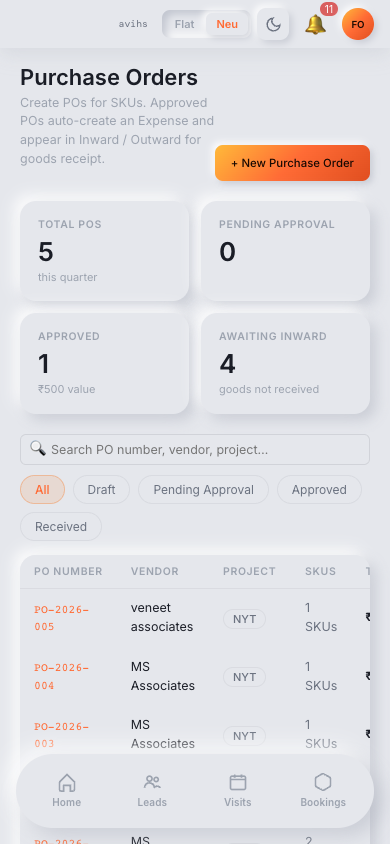
Procurement › Purchase Orders opens the list. The KPI strip shows total POs this quarter, how many await approval, how many are approved (with value), and how many are awaiting inward — i.e. approved but goods not yet received.
 Web
Web
 Mobile
Status filter chips (All, Draft, Pending Approval, Approved, Received) and a search box narrow the list. Each row shows the PO number, vendor, project, SKU count, total value, Status, Inward state, Linked Expense, and created date. View opens the detail.
3.3 — Creating a purchase order
Choose + New Purchase Order to open the create modal.
| Field | Notes |
|---|---|
| Vendor | Required — the vendor the order is placed with. |
| Project | Required — the project the order is for. Drives the expense category list. |
| Expected Delivery | The date goods are expected. |
| Expense Category | The category the resulting expense will book to. |
| Notes | Optional free text. |
| Line items | SKU, quantity, unit of measure and unit price per row. + Add line item adds more rows. |
- Save draft — stores the PO as a Draft you can keep editing.
- Save & Submit — submits the PO for approval (primary action).
3.4 — PO detail, approval and the activity log
Opening a PO shows its header (number, status, project), a summary strip, and the SKU Line Items table with ordered vs received quantities and per-line Inward Status.
- Edit — change a draft before it is approved.
- Discard — remove a draft PO.
- Submit for Approval — send the PO into the approval workflow. Once approved it auto-creates an expense and opens for goods receipt.
- Activity Log — a dated, attributed history of every change to the PO (created, submitted, returned, approved).
3.5 — How a PO connects to the other modules
- On approval, a matching Expense is created automatically (visible as the Linked Expense on the list).
- The approved PO appears under Inward / Outward › Pending POs, ready for goods receipt.
- As goods are received, the PO's Inward state moves toward Done and the received quantities update on both the PO and its expense.
Warehouses
Warehouses are the physical stores that hold inventory — a site store, an offsite warehouse, a vendor yard or a transit store.
4.2 — The Warehouses list
Procurement › Warehouses opens the list. The KPI strip shows total warehouses, total SKUs in stock, low-stock alerts and pending (in-transit) transfers.
Each warehouse is a card showing its name, active state, type and code, plus quick stats: SKUs in stock, low-stock count, movements today and the last movement date. Per card you can Edit, Deactivate, or View → the detail. The Show inactive checkbox reveals deactivated warehouses. Two tabs switch the view: Warehouses (cards) and All SKUs (combined stock).
4.3 — Creating a warehouse
Choose + New Warehouse to open the create modal.
| Field | Notes |
|---|---|
| Code | Required — a short unique code (e.g. w001). |
| Type | Site Store, Offsite Warehouse, Vendor Yard or Transit Store. |
| Name | Required — the warehouse name. |
| Location | Optional — where the store physically is. |
| Notes | Optional free text. |
Create Warehouse saves it (enabled once the required fields are filled); Cancel closes without saving.
4.4 — The All SKUs view
The All SKUs tab gives one combined stock table across every warehouse — one row per SKU per warehouse. Search by SKU or description, or filter to a single warehouse. Each row shows the SKU code and description, its warehouse, quantity on hand, unit, average purchase price and a stock status (OK / low).
4.5 — The warehouse detail
View → on a card opens the warehouse. Its header carries the name, active state and code, plus Transfer Stock and Edit actions. Three tabs organise the detail:
| Tab | What it shows |
|---|---|
| Current Stock | KPI tiles (SKUs in stock, low-stock alerts, last inward) above a Stock by SKU table with purchased, used and available quantities, unit, total stock value and status. Issue on a row issues that SKU out. |
| Movement Log | Every inward, outward and transfer that touched this warehouse. |
| Transfers | Transfers into and out of this warehouse. |
4.6 — Transferring stock between warehouses
Transfer Stock (on the list header or a warehouse detail) moves inventory from one store to another.
| Field | Notes |
|---|---|
| From Warehouse | Required — the source store. |
| To Warehouse | Required — the destination store. |
| Transfer Date | Required — when the transfer happens. |
| SKU to Transfer | Required — pick the source warehouse first, then the SKU and quantity. |
| Logistics Cost / Vendor | Optional — cost of moving the goods and the logistics vendor. |
| Notes | Optional free text. |
A transfer creates two linked movements — a Transfer Out from the source and a Transfer In at the destination — both visible in Inward / Outward.
Inward / Outward
Records every inventory movement: goods received (inward), stock issued for site use (outward), and warehouse-to-warehouse transfers.
5.2 — The movements list
Procurement › Inward / Outward opens the movements list. The KPI strip shows inwards and outwards loaded and total SKUs in stock. Three tabs organise the screen: Movements, Stock Levels and Pending POs.
On Movements, the All / Inward / Outward chips filter by direction. Each row shows the movement ID (INW-…, TRF-…), the type (Inward, Transfer In/Out), date, SKU, signed quantity (+ received, − issued), unit, batch number, warehouse, project and the reference/reason (e.g. the source PO).
5.3 — Recording inward (goods received)
Choose Record Inward to receive goods against an approved or partially received purchase order.
| Field | Notes |
|---|---|
| Purchase Order | Required — the PO the goods are being received against. Only approved / partially received POs appear. |
| Destination Warehouse | Required — the store the goods arrive into. |
| Receipt Date | Required — when the goods were received. |
| Notes | Optional free text. |
Record Inward posts the receipt: stock rises at the destination warehouse, the PO's received quantities update, and its inward state moves toward Done.
5.4 — Issuing inventory (outward)
Choose Issue Inventory to issue stock out of a warehouse for site use.
| Field | Notes |
|---|---|
| From Warehouse | Required — the store the stock leaves. |
| SKU | Required — pick the warehouse first, then the SKU to issue. |
| Issue Date | Required — when the stock was issued. |
| Reason / Notes | What the stock was used for (e.g. Foundation work Block A). |
Issue Inventory posts an outward movement and reduces the available quantity of that SKU in the warehouse. Issued value feeds the Total Spent figure on the project's Budget tab.
5.5 — The Stock Levels tab
Stock Levels is a read-only snapshot of current stock across every warehouse — warehouse, SKU code and description, quantity on hand, unit and average price. Use this as a quick cross-warehouse inventory check without opening individual warehouses.
5.6 — The Pending POs tab
Pending POs lists approved purchase orders that still have goods to receive — your inward to-do list. Each row shows the PO number and date, vendor, project, SKU, and the ordered, received and still-pending quantities. Use Record Inward to receive against any of these.
Projects
The workspace for each development. Purchase orders, expenses and inventory movements from the other modules all roll up here so you can see planned budget against actual spend.
6.2 — The Projects list
Projects › Projects opens the list. The KPI strip counts total projects and breaks them down by status: sale-approved (ready for booking), in progress (pre-launch), and not approved (pending review). A search box and status / type dropdowns narrow the list; Export downloads it and + New Project creates one.
Each row shows the project code, name and city, type (plotted / apartments / villas), status, an inventory summary (plots · available · booked) and the SR gates readiness count. Click the code to open the project workspace.
6.3 — The project workspace tabs
| Tab | What it contains |
|---|---|
| Overview | Inventory KPIs (plots total, available, booked, on hold) and construction milestones. |
| Readiness | The sale-readiness (SR) gates that must be cleared before booking. |
| Pricing | Price configuration for the project's inventory. |
| Plots / Inventory | The individual plots or units and their state. |
| Development / Budget | The development budget — categories, budgeted expense items and actual spend. |
| Documents | Project documents. |
| Financial Summary | Roll-up of the project's financials. |
| Risks / Issues | Logged risks and issues. |
| Activity Log | A dated history of changes to the project. |
6.4 — The Development / Budget tab
The Development / Budget tab is where a project's spend is planned and tracked. It groups budgeted expense items under categories, and shows planned budget beside what has actually been approved and spent. A ✓ Budget Approved badge (with the approver's name) appears once the budget is signed off.
A summary strip across the top gives the headline numbers:
| Field | What it shows |
|---|---|
| Total budget | The sum of the budget set on every expense item. |
| Expense Approved | The value of approved expenses booked against this project's budget items. |
| Total Spent | Value actually consumed — inventory issued (outward) against the project. |
| Burn | Total Spent as a percentage of Total budget — how much of the budget has been used. |
Below the summary, items are grouped into categories. Each category header shows its item count, its budget subtotal, and the approved-expense subtotal, with a + Add Expense Item button scoped to that category. Within a category, each expense item is a row:
| Column | What it shows |
|---|---|
| Expense Item | The budgeted item (e.g. Cement, Logistics and Transportation). |
| Budget | The planned budget for this item. |
| Expense Approved | Approved expense value booked to this item. |
| Total Spent | Value consumed for this item (issued from inventory). |
| Remaining | Budget minus what has been used. |
| % Used | Used as a percentage of the item's budget, with a progress bar. |
| Status | On track or a warning when an item nears or exceeds its budget. |
| Owner / Target | Optional owner and target date for the item. |
| Category | A dropdown to re-assign the item to another category (or Uncategorised). |
| Edit Budget | Opens the Edit Budget dialog to change this item's budget figure. |
6.5 — Adding a category
+ Add Category (top-right) creates an empty category section you can then add items to. The only required field is the Category name (e.g. Civil Work, Electrical, Finishing). An empty section is created; add expense items to it afterwards.
6.6 — Adding an expense item
+ Add Expense Item (in the header, or on a category) adds a budgeted line to the budget.
| Field | Notes |
|---|---|
| Category | Which category the item belongs to. Choose an existing category, — No category —, or + New category… to create one inline. |
| Item | Required — the item being budgeted, chosen from the project's item list (e.g. Cement, Logistics and Transportation). |
| Budget (₹) | Required — the planned budget amount for the item. |
| Target date | Optional — a target date for the item. |
| Notes | Optional free text. |
Add Expense Item saves the line into its category; Cancel closes without saving.
6.7 — Editing an item's budget
Edit Budget on any item row opens a focused dialog to change just that item's budget figure. The summary, Remaining, % Used and Burn all recalculate on save.
Putting it together: the procurement flow
The modules form a single chain, and a project's Budget tab is where it all lands. Follow these six steps for a typical order.
-
Plan the budget — Projects › open a project › Development / Budget. Add categories and expense items with their budgets before any spend begins.
-
Raise a purchase order — Purchase Orders › + New Purchase Order. Fill in the vendor, project, SKUs and quantities, then Save & Submit for approval.
-
Approval files the PO. blink i automatically creates a matching Expense and lists the PO under Inward / Outward › Pending POs. The approved expense value shows against the project budget as Expense Approved.
-
Receive the goods — Inward / Outward › Record Inward against the PO. Stock rises in the destination Warehouse; the PO's inward state moves to Done.
-
Move or consume stock — Transfer Stock between warehouses, or Issue Inventory for site use. Issued value raises the project's Total Spent and Burn.
-
Clear the payment on the linked Expense — Expenses › View › Record Payment — until the remaining balance is zero.

At each step the modules stay in sync: the PO knows what has been received, the warehouse knows what it holds, the expense knows what has been paid, and the project's Budget tab shows planned budget against live approved and spent figures.