Getting started
Settings is where workspace administrators configure blink i to match their company — from brand details and project structure to third-party integrations and notification rules. Most changes take effect the moment you save them.
1.2 — Who can access Settings
Not every admin has access to every Settings section. Access is scoped by role so that sensitive financial configuration cannot be changed by someone who only manages the sales pipeline.
| Settings area | Who can access |
|---|---|
| Company (name, logo, GSTIN, fiscal year, currency) | Founder, Finance Head |
| Billing | Founder, Finance Head |
| Projects (create, edit, archive) | Founder, Sales Manager |
| Integrations (Tally, Email, WhatsApp) | Founder, Finance Head (Tally); Founder (Email, WhatsApp) |
| Approval Workflows | Founder, Finance Head, Sales Manager (for their own module) |
| Notifications (workspace defaults) | Founder, any admin role |
| My Account (personal preferences) | Every user — their own account only |
The Settings icon (cog) appears at the bottom of the left sidebar for all admin-level users. Standard agents and Sales Agents see a limited My Account view for their personal preferences only — they do not see the full Settings panel.
1.3 — Settings sections
Once inside Settings, the left rail shows the main sections. Each section groups related configuration:
| Section | What it covers |
|---|---|
| Company | Business identity — name, logo, registered address, tax numbers, currency, date format, fiscal year. |
| Projects | Create and manage real estate projects — the top-level grouping everything else in blink i is scoped to. |
| Integrations | Third-party connections — Tally ERP, custom email domain, WhatsApp Business API. Each integration has its own sub-page. |
| Notifications | Workspace-wide defaults for which events send email vs in-app vs both. |
| Billing | Subscription plan, payment history, and seat management for the blink i workspace. |
Company settings
Navigate to Settings › Company to configure the business identity fields that appear across generated documents — booking forms, payment receipts, PO printouts, and email footers.
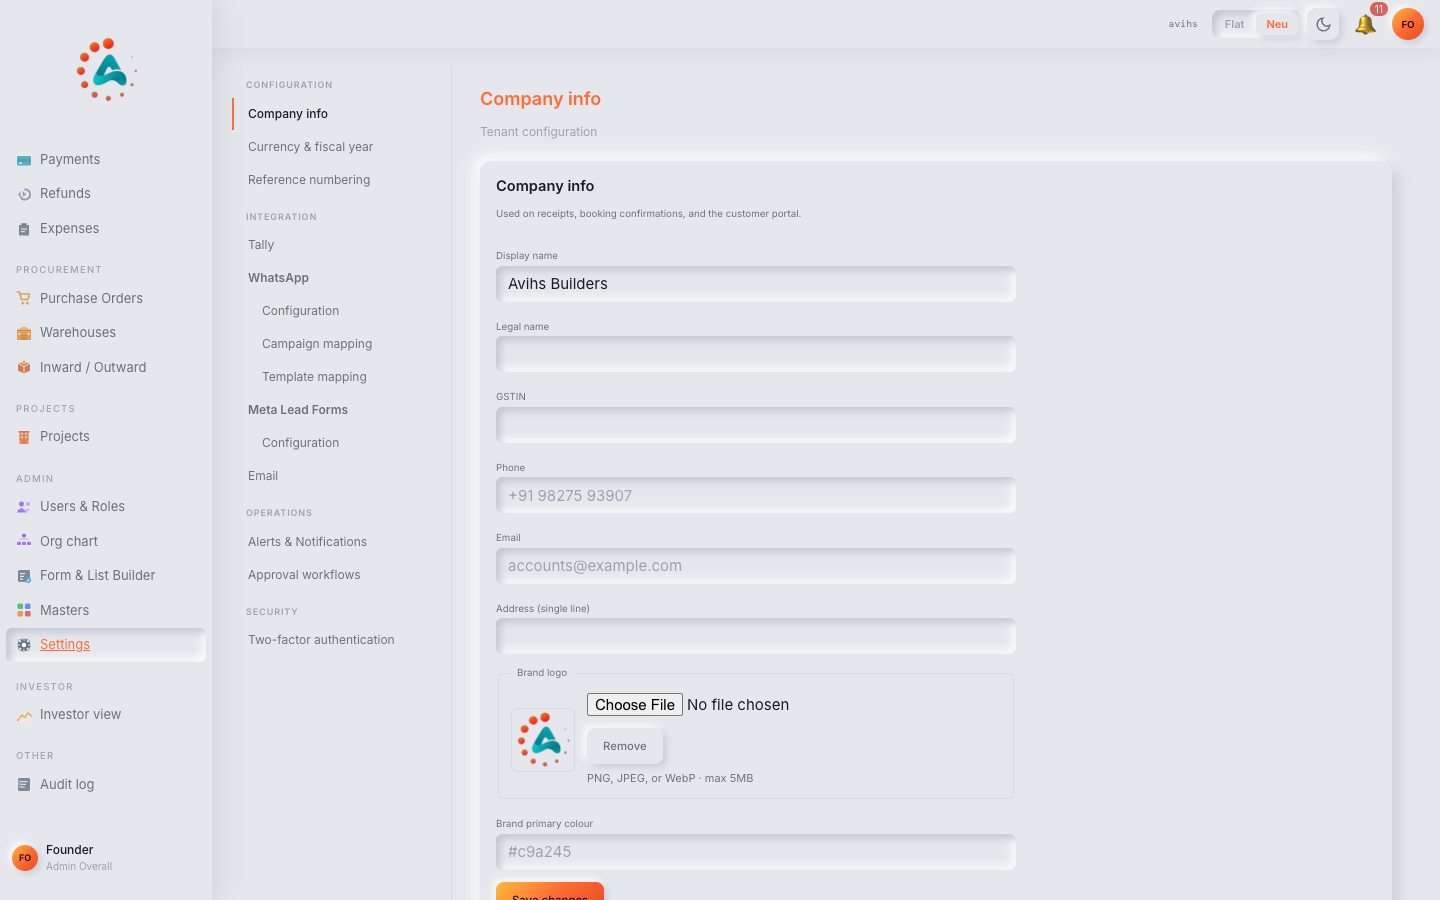 Web
Web
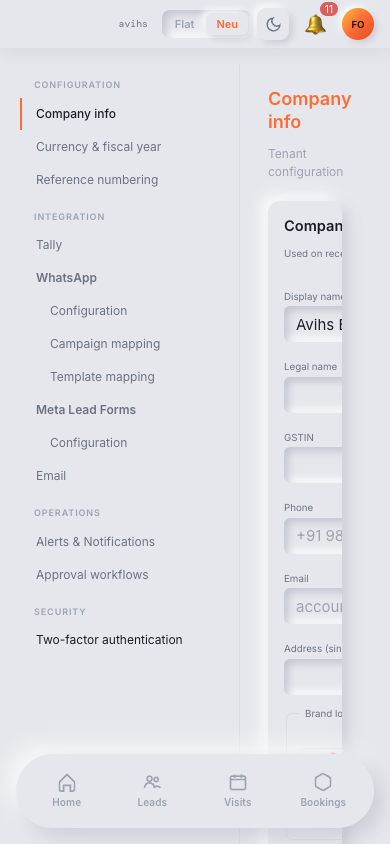 Mobile
2.2 — Fields & logo
All fields in the Company section appear on outbound documents when printed or emailed. Keep them current and exactly as registered — errors here will appear on customer-facing paperwork.
| Field | Notes |
|---|---|
| Company name | Full legal name of the entity. Appears in document headers and email signatures. |
| Logo | PNG or JPG, maximum 2 MB. Displayed in the app header and on all printed/PDF documents. Recommended minimum 200 × 200 px at 2× for retina clarity. Transparent-background PNGs work best. |
| Registered address | Full postal address including pincode. Printed on booking forms and POs as the business address. |
| GSTIN | 15-character GST Identification Number. Printed on all taxable documents. |
| CIN | Company Identification Number (MCA). Optional — include if your entity is registered under the Companies Act. |
| PAN (company) | Permanent Account Number of the company entity. Shown on financial documents where PAN disclosure is required. |
| Contact email | General business contact email — shown on document footers and used as the Reply-To for system emails when no custom reply-to is configured. |
| Support phone | Phone number printed on customer-facing documents. Not used for any automated calling — display only. |
2.3 — Fiscal year, currency, and date format
These settings affect how blink i groups data in period-based reports and how numbers are displayed across the product.
| Setting | Default | Notes |
|---|---|---|
| Fiscal year start month | April | Standard for Indian companies (April–March). Changing this mid-year resets period-based reports — budget vs actuals, expense summaries, and sales dashboards will recalculate from the new boundary. Only change at the close of your current financial year. |
| Currency | INR (₹) | Sets the currency symbol shown throughout the product. The decimal places field controls whether amounts show ₹1,00,000 or ₹1,00,000.00 — two decimal places is the default and recommended for receipts. |
| Decimal places | 2 | Applied to all monetary displays. Set to 0 if your team works with whole-rupee amounts only. |
| Date format | DD/MM/YYYY | Controls how dates are displayed in the app and on documents. Choose MM/DD/YYYY only if your team and clients are accustomed to that format. Does not affect how dates are stored internally. |
Projects
A Project is the top-level grouping in blink i. Every lead, booking, site visit, expense, and purchase order belongs to a project. Nothing can be created without at least one active project in the workspace.
3.2 — Creating a project
Navigate to Settings › Projects and click + New Project. Fill in the project details:
| Field | Notes |
|---|---|
| Project name | The internal and customer-facing name — e.g. "Sunrise Heights Phase 1". Shown on all records, documents, and reports scoped to this project. |
| Location / address | Full site address. Used on booking forms and PO printouts for the project site. |
| Type | Residential, Commercial, or Mixed. Used to filter reports and controls which inventory templates are available. |
| Total units / plots | The total count of sellable inventory in this project. blink i tracks the sold, available, and blocked counts against this number. Cannot be reduced below the number of existing bookings once created. |
| Launch date | The official sales launch date. Used as the start point for sales velocity calculations on the project dashboard. |
| Possession date | Expected date of possession to buyers. Shown on booking forms and tracked in project milestone reports. |
| RERA registration number | The project's RERA number. Printed on all customer-facing documents as required by the Real Estate (Regulation and Development) Act, 2016. |
| Project thumbnail | An image shown on the project card in dashboards and reports. PNG or JPG, maximum 5 MB. Landscape orientation recommended. |
Click Create Project to save. The project becomes immediately available in all dropdowns across the workspace — agents can assign leads and create bookings against it right away.
3.3 — Editing and archiving a project
Open a project from Settings › Projects and click Edit to modify its details.
What can be changed: Project name, RERA number, possession date, thumbnail image, and location. These can be updated at any time — changes reflect on all new documents generated after saving.
What cannot be reduced: The total unit / plot count cannot be set lower than the current number of confirmed bookings. If 40 units are booked in a 100-unit project, the unit count floor is 40. To correct an over-count, contact support.
Archiving a project: When a project is complete or no longer actively selling, archive it from the project detail page using Archive Project. Archiving:
- Removes the project from all active dropdowns — agents cannot assign new leads or create new bookings against it.
- Preserves all historical data — every lead, booking, expense, and PO remains fully visible in reports and searches.
- Marks the project with an Archived badge wherever it appears in the product.
- Can be reversed — open the archived project and click Restore Project to make it active again.
3.4 — Project phases
Large projects with multiple construction or sales phases can be subdivided using the Phases feature. A phase is a named sub-grouping within a project — it gets its own inventory count, payment plan templates, and can have a separate launch date and possession date.
To add a phase, open the project and click + Add Phase in the Phases panel. Configure the phase:
| Field | Notes |
|---|---|
| Phase name | E.g. "Phase 1 — Tower A" or "Block B — Commercial". Shown on inventory and bookings scoped to this phase. |
| Units / plots in phase | The count of units in this phase specifically. Must not exceed the parent project's remaining unallocated units. |
| Phase launch date | When this phase opens for sales. Independent of the parent project launch date. |
| Phase possession date | Expected handover for units in this phase. Shown on booking forms for phase-specific bookings. |
Once phases are created, inventory (plots / units) can be assigned to a specific phase during inventory setup. Payment plans can be configured per phase, allowing different instalment schedules for Phase 1 vs Phase 2 within the same project.
Tally integration
blink i can push approved financial records — expenses, booking payments, and purchase orders — to Tally ERP automatically, eliminating double-entry between your CRM and your accounting system.
4.2 — Connecting to Tally
The integration uses a lightweight Tally Connector — a small background process installed on the Windows PC that runs Tally ERP. The connector opens a local HTTP listener that blink i pushes records to. Navigate to Settings › Integrations › Tally and follow these steps:
-
Download the Tally Connector installer — click Download Connector on the Tally integration page. This downloads a Windows installer (
.exe) specific to your workspace. -
Run the installer on the Tally PC — the PC must be the one running Tally ERP, with a stable internet connection. The installer registers the connector as a Windows service that starts automatically on boot.
-
Open Tally ERP — the connector needs Tally to be running and a company to be open. The connector attaches to the open company — confirm it is the correct one before proceeding.
-
Verify the connection — return to Settings › Integrations › Tally in blink i and click Test Connection. The status indicator should turn green within 30 seconds.
The status indicator on the Tally integration page reflects the current connector state:
| Status | Meaning | Action |
|---|---|---|
| Connected | The connector is running and Tally is reachable. Sync is active. | No action needed. |
| Disconnected | The connector is not running, or the PC is offline or powered off. | Ensure the Tally PC is on and the connector service is running. Check the Windows Services panel for "blink i Tally Connector". |
| Sync error | The connector is running but Tally rejected one or more records — typically a missing ledger or a Tally company mismatch. | Check the Sync Log for the specific error. Usually resolved by fixing ledger mapping or reopening the correct Tally company. |
4.3 — What syncs to Tally
Sync is one-way — blink i pushes records to Tally. Tally data never flows back into blink i. Only records that have been approved in blink i are eligible for sync; draft or pending records are never pushed.
| blink i record | Tally voucher type | When it syncs |
|---|---|---|
| Approved expense | Journal voucher or Payment voucher, posted to the mapped expense ledger. | Immediately after the expense is approved in blink i. |
| Recorded booking payment | Receipt voucher, posted to the revenue ledger for the project. | When a payment collection is recorded against a confirmed booking. |
| Approved purchase order (on goods receipt) | Purchase voucher, posted to the mapped expense category ledger. | When goods receipt is confirmed in Inward / Outward — not at PO approval, but at physical receipt. |
Each pushed record carries a reference back to its blink i ID (e.g. EXP-042, PO-019) in the Tally voucher narration field — making it easy to trace a Tally entry back to the originating record in blink i.
4.4 — Ledger mapping
Before any sync can succeed, each blink i expense category must be mapped to an existing Tally ledger name. Navigate to Settings › Integrations › Tally › Ledger Mapping.
The mapping table lists every expense category configured in blink i. For each one, type or select the exact Tally ledger name it should post to. Ledger names are case-sensitive and must match Tally exactly.
| blink i category | Example Tally ledger |
|---|---|
| Civil Work | Civil Expenses |
| Marketing & Advertising | Advertisement Expenses |
| Site Operations | Site Running Expenses |
| Commission Payable | Brokerage & Commission |
| Office & Admin | General & Administrative Expenses |
For booking payments, configure the revenue ledger separately under Revenue Ledger in the Tally settings — one ledger per project is supported, or a single ledger for all projects.
4.5 — Sync log and manual sync
The Sync Log at Settings › Integrations › Tally › Sync Log shows a full history of every record pushed to Tally. Each row shows:
- blink i reference — the originating record ID (e.g.
EXP-042). - Record type — Expense, Payment, or Purchase Order.
- Pushed at — timestamp of when blink i sent the record to the connector.
- Tally voucher number — the voucher number assigned by Tally on acceptance. Empty if the push failed.
- Status — Synced, Pending sync (awaiting ledger mapping or connector reconnect), or Error (Tally rejected the record with a reason).
- Error detail — shown on Error rows. Common errors include "Ledger not found" (fix: correct the ledger mapping) and "Company mismatch" (fix: open the correct company in Tally).
Manual sync: Click Sync Now on the Tally integration page to immediately push all pending unsynced records. This is useful after resolving a ledger mapping gap or after the connector reconnects following a period of downtime. Sync Now only pushes records that have not already been successfully synced — it never creates duplicates.
Email settings
blink i sends system emails — user invites, approval notifications, password resets, and payment reminders — on behalf of your workspace. By default these come from a shared Avihs Tech sending domain. You can configure a custom domain so emails appear to come from your own company address.
5.2 — Custom sending domain
Navigate to Settings › Integrations › Email and click Configure Custom Domain. Enter the domain you want to send from (e.g. yourdomain.com) and blink i will generate three DNS records that must be added to your domain's DNS configuration.
| DNS record type | Purpose | Where to add it |
|---|---|---|
| SPF (TXT) | Authorises Avihs Tech mail servers to send on behalf of your domain. Prevents emails being rejected as spam by recipient mail servers. | Add as a TXT record on your root domain (@). If an SPF record already exists, append the blink i include value to it — do not create a second TXT record. |
| DKIM (TXT) | Cryptographically signs outbound emails so recipients can verify they genuinely came from your domain. | Add as a TXT record on the DKIM subdomain shown (e.g. blinki._domainkey.yourdomain.com). |
| DMARC (TXT) | Tells receiving mail servers what to do with emails that fail SPF or DKIM checks. Strongly recommended to protect your domain from spoofing. | Add as a TXT record on _dmarc.yourdomain.com. blink i provides a recommended p=none policy to start — tighten to p=quarantine or p=reject once you confirm delivery is stable. |
The exact record values — including the full SPF include string and DKIM public key — are displayed on the Email settings page with a one-click copy button for each. Paste them into your DNS provider (Cloudflare, GoDaddy, Route53, or wherever your domain is managed).
DNS propagation typically takes 5–30 minutes, though it can take up to 48 hours globally. Click Verify DNS on the settings page — blink i will check for the records and show a green tick against each one that is confirmed. Only after all three are verified will sending switch to your custom domain.
Notification preferences
blink i can notify your team of important events through multiple channels. Workspace-level defaults control what gets sent by default; each user can then override their own preferences without affecting teammates.
6.2 — Workspace defaults
Navigate to Settings › Notifications to configure workspace-wide defaults. These apply to every user who has not set a personal override for that event.
For each notification event, choose the delivery mode:
| Mode | What it does |
|---|---|
| Both | Sends an in-app notification (bell icon) and an email. Recommended for high-priority events like approval requests and payment overdues. |
| In-app only | Adds a notification to the bell icon panel — no email is sent. Good for lower-urgency events where email volume would be a distraction. |
| Email only | Sends an email with no in-app notification. Rarely used — most events benefit from at least in-app visibility. |
| None | No notification is sent for this event at the workspace level. Users who want to be notified must opt in via their personal preferences. |
6.3 — Per-user overrides
Each user can override their own notification preferences under Settings › My Account › Notifications. This page shows every notification event alongside the current workspace default and a personal override control.
A user override takes precedence over the workspace default for that user only. Examples:
- A Sales Agent who never manages approvals can mute "Approval request received" and "Approval decision made" — they never act on those, so the notifications are noise.
- A Finance Head who wants immediate visibility on every payment event can set "Payment due" and "Payment overdue" to Both even if the workspace default is in-app only.
- A user going on leave can temporarily set all events to None without affecting their teammates.
Admins cannot force a specific notification preference on individual users — overrides are always user-controlled. The workspace default is simply the starting point for users who have not customised their preferences.
6.4 — Notification events and channels
The full set of notification events available in blink i:
| Event | Who it typically goes to |
|---|---|
| New lead assigned | The agent the lead was assigned to. |
| Follow-up due | The agent owning the lead, when a scheduled follow-up date arrives. |
| Site visit upcoming | The agent managing the visit, the day before the scheduled visit. |
| Approval request received | The current step's approver(s) when a record is submitted for approval. |
| Approval decision made | The submitter, when their request is approved, returned, or rejected. |
| Payment due | The agent on the booking, when a payment instalment is due within the configured advance notice window. |
| Payment overdue | The agent and the Finance Head, when a payment instalment is past its due date. |
| Campaign completed | The admin who launched the campaign, when a WhatsApp or email broadcast finishes sending. |
| System alerts | All admin users — for integration errors, connector disconnections, and billing issues. |
The available notification channels are:
| Channel | Notes |
|---|---|
| In-app (bell icon) | Appears as a count badge on the bell icon in the top-right corner of blink i. Click the bell to see all recent notifications. Notifications remain visible for 30 days. |
| Sent to the email address associated with the user's blink i account. Uses the configured sending domain (custom or default Avihs Tech domain). | |
| WhatsApp (staff) | Sends a WhatsApp message to the staff member's registered mobile number. This is a separate channel from customer-facing WhatsApp automations — it uses your connected WhatsApp Business API account but targets internal team members, not leads or customers. |
End-to-end setup flow
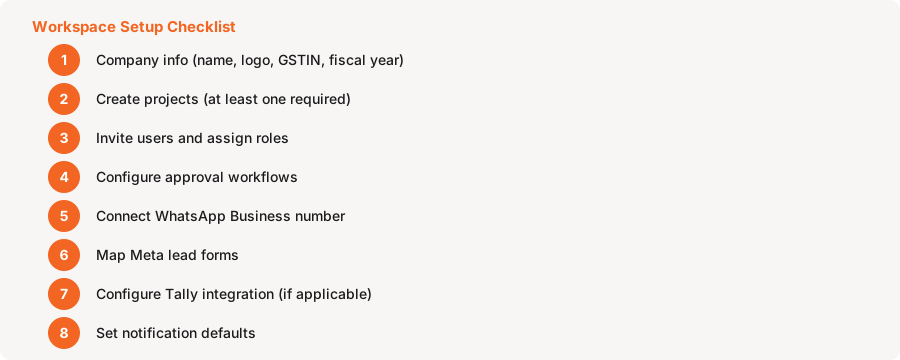
Setting up a brand-new blink i workspace for the first time. Complete these steps in order — some later steps depend on earlier ones being in place.
-
Fill in Company information — go to Settings › Company and add your company name, logo, registered address, GSTIN, CIN, PAN, contact email, and support phone. Set the fiscal year start month and confirm the currency and date format. These fields appear on every document blink i generates — get them right before any bookings or documents are created.
-
Create at least one Project — go to Settings › Projects › + New Project. Leads cannot be assigned and bookings cannot be created until a project exists. Add the project name, RERA number, total units, launch date, and possession date. If your project has multiple phases, add them now under the Phases panel.
-
Invite users and assign roles — go to Settings › Users › Invite User. Add your sales managers, finance team, agents, and any other team members. Assign each the appropriate role — the role controls which modules and settings they can see and edit. See the Users & Roles guide for a full role breakdown.
-
Configure approval workflows — go to Settings › Approval Workflows. Set up at minimum a Booking approval workflow (who must sign off before a sale is confirmed) and an Expense approval workflow (who authorises spend). Without these, every submitted record will require manual handling. See the Approvals guide for step-by-step configuration.
-
Connect WhatsApp — go to Settings › Integrations › WhatsApp and connect your WhatsApp Business API account. This enables inbound lead capture from WhatsApp, outbound automated messages, and staff notifications via WhatsApp. See the WhatsApp & Comms guide for the full connection walkthrough.
-
Map Meta lead forms — if you run Facebook or Instagram lead generation ads, connect your Meta account and map each ad form to a blink i project under Settings › Integrations › Meta Leads. Once mapped, leads from your ads arrive in blink i automatically and can be assigned to agents immediately.
-
Configure Tally integration (if applicable) — if your accounts team uses Tally ERP, download and install the Tally Connector on the accounts PC (see Chapter 4), verify the connection, and complete the ledger mapping for all expense categories. Expenses and payments will begin syncing to Tally from the moment the first record is approved.
-
Set notification defaults — go to Settings › Notifications and configure workspace-wide defaults for each event. Set approval-related and overdue-payment events to Both (in-app and email) so nothing is missed in the early days. Users can tune their personal preferences once they are onboarded and know which notifications matter to them.
Your workspace is now fully configured. From here, agents can start receiving and working leads, bookings can be created and submitted for approval, and the finance team will see expenses and PO data syncing to Tally without any manual re-entry.