Getting started
blink i uses role-based access controls (RBAC) to determine what each person in your workspace can see and do. Every user is assigned exactly one role, and that role determines their permissions across every module — Leads, Bookings, Finance, Procurement, and Settings. Permissions are resolved live at request time, never cached, so a role change takes effect immediately on the user's next action.
1.3 — Who can manage users
Only users with the Founder / Owner role or the workspace admin flag can invite users, change roles, deactivate accounts, or configure the org chart. Regular users — including Sales Managers — cannot manage other users' accounts. A Sales Manager who needs to add a team member must ask a Founder or admin to do it.
Roles
blink i ships six built-in roles covering the full range of a real estate developer's team. Each user is assigned exactly one role. Roles are not additive — a user cannot hold two roles simultaneously. If someone has responsibilities that span two roles, use the role that covers their primary function and supplement with project restrictions or admin flags as needed.
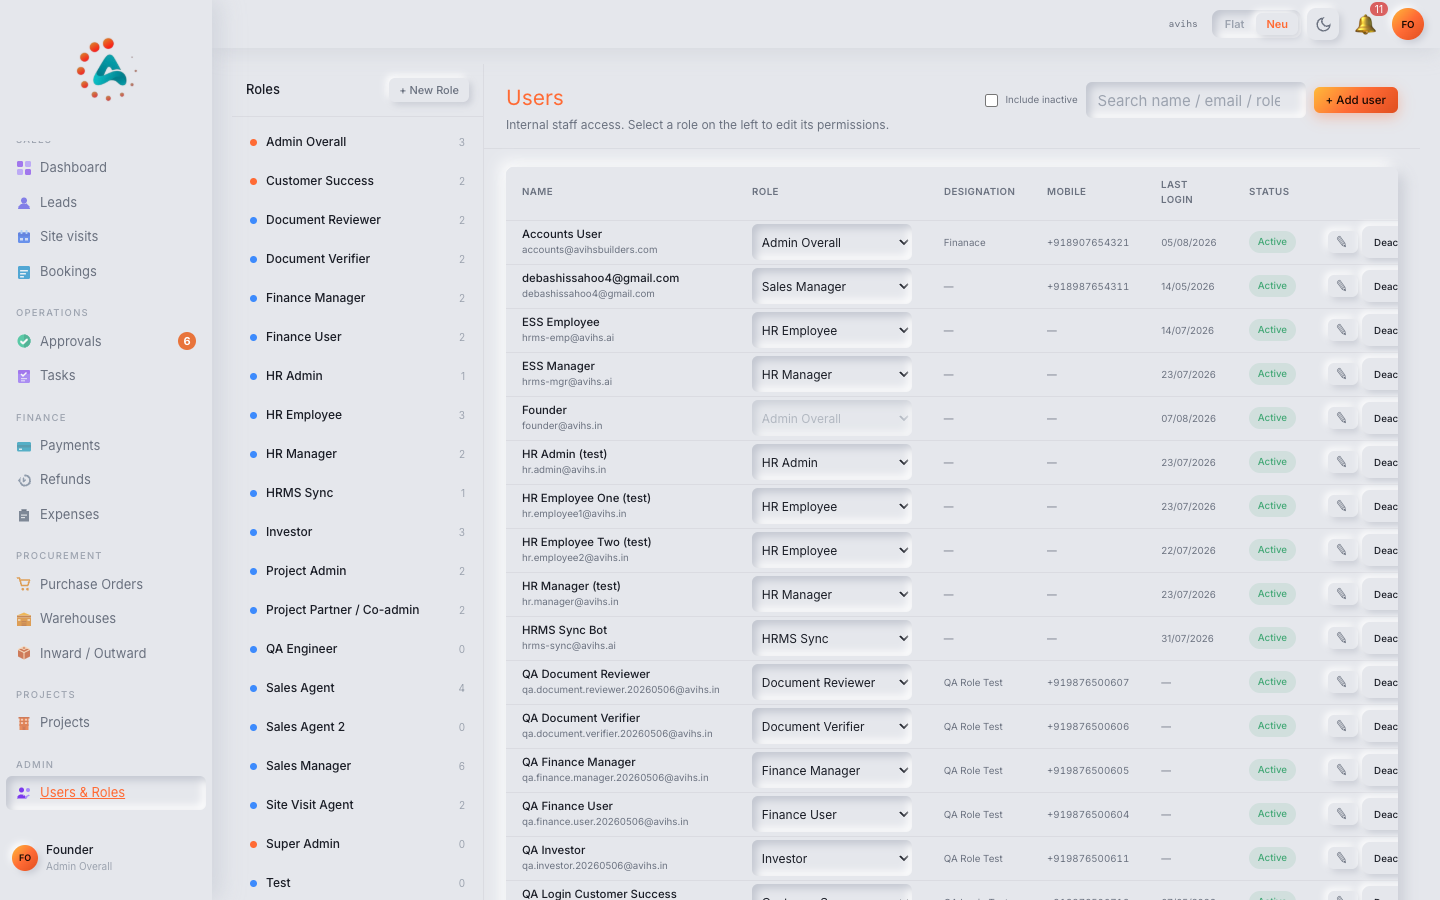 Web
Web
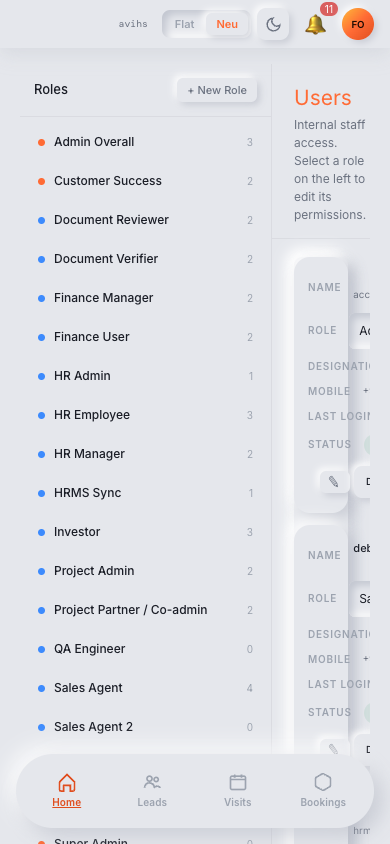 Mobile
2.1 — Role definitions
| Role | What they can do |
|---|---|
| Founder / Owner | Unrestricted access to every module, every setting, and every record in the workspace. This includes billing management, workspace deletion, all approval workflows, and all user management. The Founder account is created automatically when the workspace is provisioned. There must always be at least one active Founder account — the system will not let you deactivate the last one. |
| Finance Head | Full access to all Finance and Expense records, Purchase Orders, payment records, and financial reports across all projects. Can approve expenses and POs in the approval queue. Has view access to Bookings (to reconcile payment schedules) but cannot create or modify bookings. Cannot access Leads or reassign agents. Cannot modify workspace settings. |
| Sales Manager | Full access to all Leads, Bookings, and Site Visits across all projects (or assigned projects only — see Section 4.2). Can reassign leads between agents. Can approve booking requests in the approval queue. Can view team reports showing their direct reports' activity. Cannot access Finance or Procurement modules. Cannot modify workspace settings. |
| Sales Agent | Access to their own leads only — they cannot see other agents' leads unless a lead is assigned to them. Can create a booking and submit it for approval, but cannot approve. Can create and log site visits for their own leads. Cannot reassign leads to other agents. Cannot access Finance, Procurement, Reports (beyond a personal dashboard), or Settings. |
| Site Manager | Access to Site Visits, Inward/Outward goods records, and Procurement (creating Purchase Orders but not approving them). Cannot access Leads, Bookings, Finance/Expenses, or Reports. Cannot modify workspace settings. Intended for project site staff who manage day-to-day site logistics and procurement requisitions. |
| Viewer | Read-only access across all modules they are explicitly granted access to. Cannot create, edit, or delete any record. Cannot approve anything. Useful for investors, auditors, or senior leadership who need visibility without operational access. Project-level restrictions (Section 4.2) can be applied to limit a Viewer to specific projects only. |
2.2 — Permission matrix
The table below summarises each role's access level per module. Levels are cumulative upward: Admin includes all lower levels; Manage includes Create and View; Create includes View.
| Module | Founder | Finance Head | Sales Manager | Sales Agent | Site Manager | Viewer |
|---|---|---|---|---|---|---|
| Leads | Admin | None | Manage | Own only | None | View |
| Bookings | Admin | View | Manage | Create | None | View |
| Site Visits | Admin | None | Manage | Create | Manage | View |
| Finance / Expenses | Admin | Admin | None | None | View | View |
| Purchase Orders | Admin | Manage | None | None | Create | View |
| Approvals | Admin | Approve | Approve | Submit | None | View |
| Reports | Admin | Manage | Team view | Own only | None | View |
| Settings | Admin | None | None | None | None | None |
Inviting users
Adding a new team member to blink i takes under a minute. The invite goes by email; the recipient sets their own password on first login — no admin needs to handle passwords.
3.1 — How to invite a user
Navigate to Settings › Users & Roles and click + Invite User in the top-right corner. A modal opens with three fields:
| Field | Notes |
|---|---|
| Email address | The work email the new user will log in with. The invite email is sent here. If the address is already in the workspace (active or pending), blink i will warn you before sending a duplicate. |
| Role | Choose one of the six built-in roles. The role takes effect the moment the user logs in for the first time. If you are unsure, choose the most restrictive role that covers the person's responsibilities — roles can be changed later without affecting historical records. |
| Assigned projects | Optional. Select one or more projects this user can access. Leave blank to grant access to all projects (current and future). Restricting to specific projects is most useful for Sales Agents split across site-specific teams. See Section 4.2 for full details. |
Click Send Invite. blink i dispatches an email with a one-time invite link (valid for 7 days). The new user clicks the link, sets a password, and is logged in immediately with their role and project restrictions applied.
3.2 — Pending invites
Invitations that have been sent but not yet accepted appear under the Pending Invites tab. Each row shows the invitee's email, the role they were invited with, when the invite was sent, and when it expires. Two actions are available:
- Resend — generates a fresh 7-day invite link and sends it again. The previous link is immediately invalidated. Use this if the original email was missed or if 7 days have elapsed.
- Revoke — invalidates the pending invite immediately. The outstanding link stops working, and the person cannot join unless you send a new invite. Use this if you invited the wrong email or if the person is no longer joining.
A pending invite does not consume a seat until the user accepts and logs in for the first time. If your workspace is near its user limit, pending invites do not count against the seat count.
3.3 — Seat limits
Every blink i workspace has a maximum number of active users (seats) based on the current subscription plan. The current seat count is shown at the top of the Users tab as X of Y seats used. When the workspace is at its seat limit:
- The + Invite User button is disabled and shows a tooltip explaining the seat limit has been reached.
- Existing pending invites can still be accepted up to the limit — the seat is claimed on first login.
- To add more users, contact support to upgrade your plan. Seat upgrades are prorated for the remainder of the billing cycle.
Managing users
Once a user is active, you can change their role, adjust their project access, or deactivate their account. All of these actions are available from the user's detail panel in Settings › Users & Roles.
4.1 — Changing a user's role
To change the role of an active user, click their row in the Users list to open the user detail panel, then click Edit. Change the Role dropdown to the new role and click Save.
The change is immediate: on the user's very next request to the server — whether that is navigating to a page, creating a record, or an API call from the mobile app — blink i resolves their permissions fresh against the new role. There is no need to ask the user to log out and back in, though the visible navigation items in their sidebar will only refresh on their next page load.
4.2 — Assigned projects
By default, a user's role grants access across all projects in the workspace. Assigned projects is an additional restriction layer — if one or more projects are set on a user, they can only see leads, bookings, site visits, and related records that belong to those projects.
This is most useful for large sales teams split by site or phase. For example, a Sales Agent working on Project Alpha should not be able to see leads or bookings for Project Beta, even though they have the same Sales Agent role. Setting their assigned project to Alpha enforces this cleanly without needing separate workspaces.
- Assigned projects do not change the user's permissions within a project — they only filter which projects they see. A Sales Agent assigned to Project Alpha still cannot approve bookings or reassign leads within Alpha.
- Finance Heads and Founders are not affected by project restrictions — they always have cross-project access regardless of the assigned projects field.
- Leaving the field blank (the default) means the user has access to all projects, including any new projects added in the future.
- To add or remove a project assignment, open the user's detail panel, click Edit, update the Assigned Projects multi-select, and click Save.
4.3 — Deactivating a user
When a team member leaves or changes roles outside the system, deactivate their account to immediately cut their access. To deactivate a user, open their detail panel in Settings › Users and click Deactivate. A confirmation prompt shows — confirm to proceed.
Deactivation does the following, all simultaneously:
- Revokes all active web sessions — any browser session they have open is terminated on their next request.
- Revokes all mobile long-lived tokens — the Android app will show a "session expired" message and require login. Since the account is deactivated, login will fail.
- Frees the seat — the user no longer counts toward the workspace's seat limit.
- Preserves all records — leads, bookings, site visits, and any other records created by or assigned to the user are retained. Nothing is deleted. You are prompted to either reassign their open leads to another agent or leave them as Unassigned for a manager to redistribute later.
4.4 — Reactivating a user
Deactivated users appear in the Users list with a Deactivated badge. To reactivate, open their detail panel and click Reactivate. Their role and project assignments are restored exactly as they were at the time of deactivation. They must log in again — no existing session survives deactivation — but their previous credentials (email/password) work immediately once the account is active.
Reactivation consumes a seat. If the workspace is at its seat limit, the Reactivate button is disabled. Free a seat first (deactivate a different user or upgrade the plan) before reactivating.
Org chart
The org chart defines the reporting structure of your workspace — who manages whom. It does not change what anyone can do (permissions come from roles, not the org chart), but it determines how reports are aggregated and how escalation routes in approval workflows.
5.1 — Overview
Navigate to Settings › Users & Roles › Org Chart. The org chart displays all active workspace members as nodes. The Founder is at the top by default. Users with no manager assigned appear at the root level below the Founder.
The org chart affects two things in blink i:
| Feature | How the org chart is used |
|---|---|
| Approval escalation | When an approver has not acted within the configured escalation window, the request is escalated to their manager as defined in the org chart. See the Approvals guide, Section 4.5. |
| Report visibility | A Sales Manager sees the leads, bookings, and activity of all users who report directly to them (or are below them in the chain). A Sales Agent only sees their own records. This aggregation is calculated from the org chart, not the role alone. |
5.2 — Defining reporting lines
Each user can have exactly one manager. The reporting relationship is one-directional — User A reports to User B does not imply User B reports to User A. Circular hierarchies (A reports to B, B reports to A) are not permitted and blink i will prevent them.
There is no limit on how many direct reports a single manager can have, and the hierarchy can be as deep as needed. However, approval escalation only traverses one level up — an unactioned request escalates to the immediate manager, not to the manager's manager.
5.3 — How to set reporting lines
There are two ways to assign a manager:
- Drag on the org chart — drag a user node and drop it onto another user node. The dropped-on user becomes the manager. This is the fastest method when reorganising multiple people at once.
- Manager dropdown on user profile — open a user's detail panel in the Users tab, click Edit, and set the Reports to dropdown. Choose the manager from the list of active users. Click Save. This is precise and useful when you know exactly who should manage whom without needing to see the full chart.
Long-lived tokens (Mobile / Android)
Sales Agents using the blink i Android app are designed to log in once and stay logged in across days and weeks — they should not need to re-authenticate every time they open the app in the field. This is achieved through a long-lived token issued on first login from the device.
6.1 — How long-lived tokens work
When a Sales Agent logs into the Android app, blink i issues an opaque long-lived token to that device. The token is:
- Device-specific — one active token per device per user. If the same agent logs in on a second device (e.g. a new phone), a new token is issued for that device. The previous device's token remains valid until it is separately revoked or expires.
- Not a credential — the token does not carry the user's password and cannot be used to change account settings. It authorises API requests only.
- Permission-resolved live — on every request made with the token, blink i checks the user's current role and project assignments. A role change made by an admin is reflected instantly on the mobile app without the user needing to log out and back in.
- Valid for 90 days — tokens expire automatically after 90 days of issuance (not last use). The app will prompt the user to log in again when the token expires.
6.2 — Invalidation triggers
A long-lived token is immediately invalidated — and the app session terminated — if any of the following occur:
| Trigger | What the user sees |
|---|---|
| User changes their password | All tokens for all devices are invalidated. The user must log in again on every device. |
| Admin changes the user's role | All tokens for all devices are invalidated. This ensures the new role's permission set is applied cleanly on next login, rather than being layered over an old session. |
| Admin deactivates the account | All tokens immediately invalidated. The app shows a "session expired" message and the login attempt fails, since the account is inactive. |
| Admin revokes a specific device session | Only the token for that device is invalidated. Tokens on other devices remain valid. The app on the revoked device shows a "session expired" prompt and requires login. |
| 90-day expiry | The token expires silently. The next API request returns a 401 and the app shows a login screen. |
6.3 — Revoking a device session
To revoke a specific device's token without affecting the user's other sessions or password:
-
Open the user's detail panel — navigate to Settings › Users and click the user's row.
-
Go to Active Sessions — click the Active Sessions tab within the user panel. This lists every active long-lived token, showing the device name, device model, operating system, the IP address of the last request, and the timestamp of last activity.
-
Revoke the session — find the row for the device you want to cut off and click Revoke. Confirm in the prompt. The token is invalidated immediately and the audit log records who revoked it and when.
The Audit Trail panel below the Active Sessions list shows every token issuance and revocation for this user, with device information and timestamps. This trail is read-only and cannot be modified or deleted — it is available to Founders and workspace admins for compliance review.
End-to-end flow
A new Sales Agent, from invitation through to being fully operational in the workspace — every step an admin and the user go through.
-
Admin invites the user — navigates to Settings › Users & Roles, clicks + Invite User, enters the agent's work email, sets the role to Sales Agent, and selects the relevant project (e.g. Project Horizon). Clicks Send Invite. The invite appears immediately in the Pending Invites tab.
-
User accepts the invite — the agent receives an email with a one-time link, clicks it, sets a password, and is taken directly to the blink i home dashboard. The pending invite is removed and the user appears as active in the Users list.
-
User logs in and permissions are applied — blink i resolves the agent's permissions on first login: Sales Agent role with access restricted to Project Horizon. The sidebar shows Leads, Bookings, and Site Visits only — no Finance, Procurement, or Settings navigation items are visible.
-
Role is confirmed and adjusted if needed — the admin reviews the user's access in the Users tab. If any project restriction needs changing or the role is wrong, they click Edit on the user, make the adjustment, and save. The change is live on the agent's next request.
-
User is assigned to the correct projects — confirmed in the user's detail panel. If the agent should only ever see Project Horizon leads, the Assigned Projects field shows
Project Horizon. Any lead or booking from another project is invisible to them. -
Manager is set in the org chart — the admin opens Settings › Users & Roles › Org Chart and drags the new agent's node onto their Sales Manager's node. The agent now appears as a direct report. The Sales Manager's team reports will include this agent's leads and bookings. If an approval the agent submits is not acted on in time, escalation will route to this manager.
-
Audit trail entry created — every action — invite sent, invite accepted, role set, project restriction saved, org chart assignment — is recorded in blink i's audit log with a timestamp and the identity of the admin who made each change. The trail is visible to Founders and admins under the user's detail panel and in the workspace-level audit log under Settings.
From this point the agent is fully operational: they can view and work their leads within Project Horizon, create bookings for submission to their Sales Manager's approval queue, and log site visits — all within the bounds of the Sales Agent role. Any future role changes, project re-assignments, or org chart moves made by an admin take effect immediately without any re-login required from the agent.